


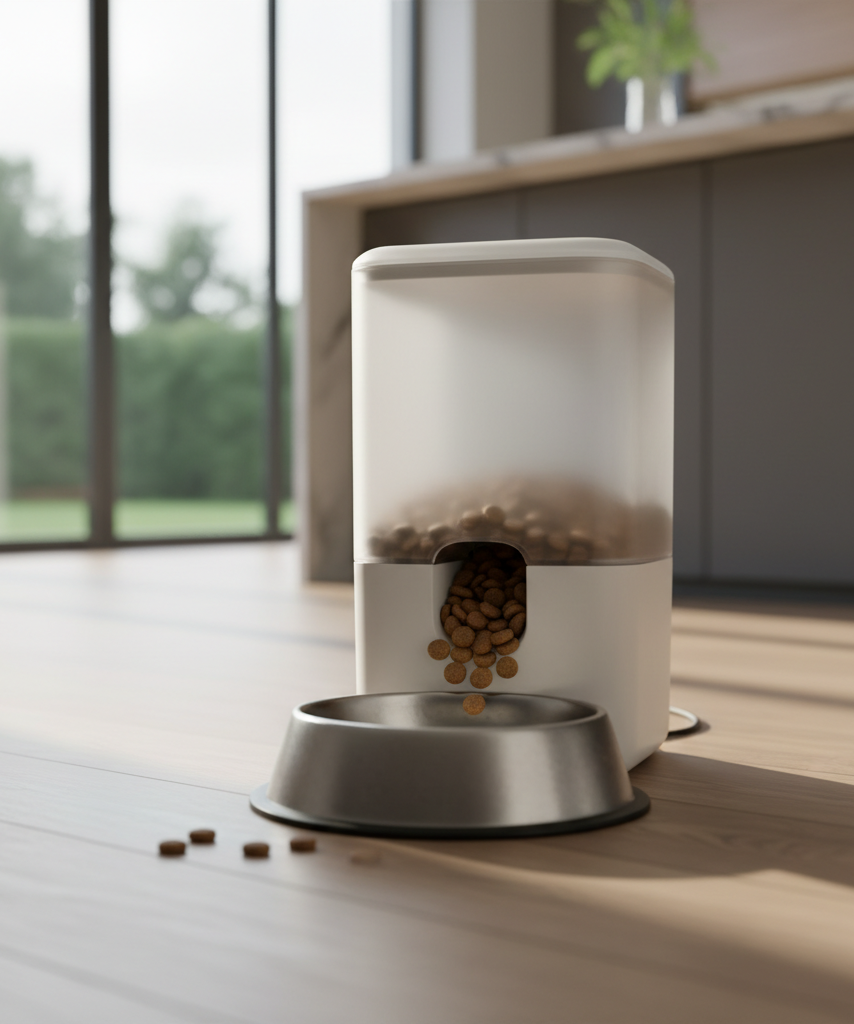
Why Your Automatic Pet Feeder Isn’t Dispensing Food Properly
If your automatic pet feeder isn’t dispensing food properly, the problem usually comes down to one of a few practical issues: kibble that is too large or oily, a partially blocked chute, a misaligned bowl or rotor, low battery power, or feed settings that no longer match your pet’s actual schedule. The good news is that most feeder problems are fixable without replacing the entire unit.
This guide walks through the most common causes, what to check first, and when an automatic feeder has crossed the line from “needs maintenance” to “time for an upgrade.” If you’ve been wondering why your automatic dog feeder is not working or why your pet feeder keeps jamming, start here.
Most Common Reasons an Automatic Pet Feeder Stops Dispensing
Automatic feeder troubleshooting is easier when you break the problem into categories instead of assuming the motor has failed.
1. The kibble is the wrong size or texture
One of the biggest reasons an automatic pet feeder is not dispensing food is that the kibble itself does not move cleanly through the hopper and chute.
Common food-related causes include:
- oversized kibble pieces that catch in the opening
- irregularly shaped pieces that bridge together
- oily residue that makes food cling to the inside walls
- damp kibble that starts to soften and clump
- mixed food sizes that feed unevenly
Many feeders work best with dry kibble in a fairly narrow size range. If your unit suddenly struggles after a food change, the feeder may not be the real problem.
2. The chute or rotor has a partial blockage
A pet feeder jammed with crumbs, food dust, grease, or a single wedged piece of kibble may still sound like it is trying to run. That often confuses owners into thinking the electronics are fine and the feeding path must be clear. It usually isn’t.
Look closely at:
- the chute opening
- the rotating wheel or impeller
- the underside of the lid
- corners where crushed kibble collects
- the bowl area where food exits
A partial blockage can reduce output gradually, which is why some owners first notice smaller portions rather than a complete failure.
3. The feeder is on low battery or unstable power
Some feeders still light up or respond to buttons when battery power is weak, but the motor no longer has enough consistent force to push dry food through a tight passage. If you use a wall adapter, a loose connection can create similar symptoms.
Signs of a power-related problem include:
- missed feedings at random times
- motor noise without a full portion release
- timer settings resetting unexpectedly
- the screen dimming or flickering
- successful manual feeds but unreliable scheduled feeds
4. The setup or bowl position is interfering with dispensing
This sounds minor, but placement matters. If the bowl is pushed too tightly against the base, if the feeder sits unevenly on a mat, or if the unit has shifted during cleaning, food can hit the edge and back up into the outlet.
Also check whether:
- the feeder is level
- the bowl is correctly seated
- the hopper is locked into place
- the lid sensor is fully engaged, if your model uses one
- the internal assembly was reinstalled correctly after washing
5. Moisture and humidity are creating clumps
In humid kitchens, laundry rooms, garages, or covered patios, kibble can absorb enough moisture to form small sticky clusters. That is a classic cause of an automatic pet feeder not dispensing food on schedule even though it worked perfectly before.
This issue is especially common when:
- the food bag has been left open
- the feeder is refilled with warm food from a recently opened delivery box
- the feeder is near a dishwasher, sink, or pet water fountain
- owners top off old kibble instead of emptying and refreshing the bin
How Kibble Size, Moisture, and Setup Affect Performance
Not every dispensing issue means the feeder is defective. In many cases, it is a compatibility problem between the machine, the food, and the environment.
Kibble size matters more than most owners expect
A feeder can be advertised for cats and small dogs but still struggle with chunky dental kibble, freeze-dried mix-ins, or blends with inconsistent shapes. If one portion releases normally and the next stalls, inconsistent food geometry is often the reason.
A quick test is to compare three things:
- the width of the kibble pieces
- the width of the dispenser opening
- whether the food flows freely when you rotate the mechanism manually during cleaning
If food only passes when shaken, the feeder is already telling you the fit is marginal.
Moisture changes flow behavior fast
Even slightly softened kibble behaves differently inside a hopper. It creates more friction, leaves more residue, and increases the chance of food sticking to the sides instead of sliding toward the dispenser.
To reduce moisture-related jams:
- store food in a sealed container
- clean the hopper before residue builds up
- avoid placing the feeder in steam-prone rooms
- refill with fully dry kibble only
- do not mix fresh dry food into stale crumbs at the bottom
Setup errors can mimic mechanical failure
After a deep clean, it is easy to reinstall an auger, lid, tray, or bowl a few millimeters off. That small alignment issue can be enough to create erratic feeding.
If your feeder stopped working right after cleaning, moving houses, or switching rooms, inspect the assembly before assuming a broken motor or bad circuit board.
Quick Troubleshooting Checklist
If you need a fast answer, run through this list in order before you shop for a replacement.
Step 1: Empty the hopper completely
Do not just top it off. Remove all food and check for:
- clumped kibble
- powder buildup
- oily film
- lodged pieces in the chute
- insects or contamination if the feeder sits in a warm area
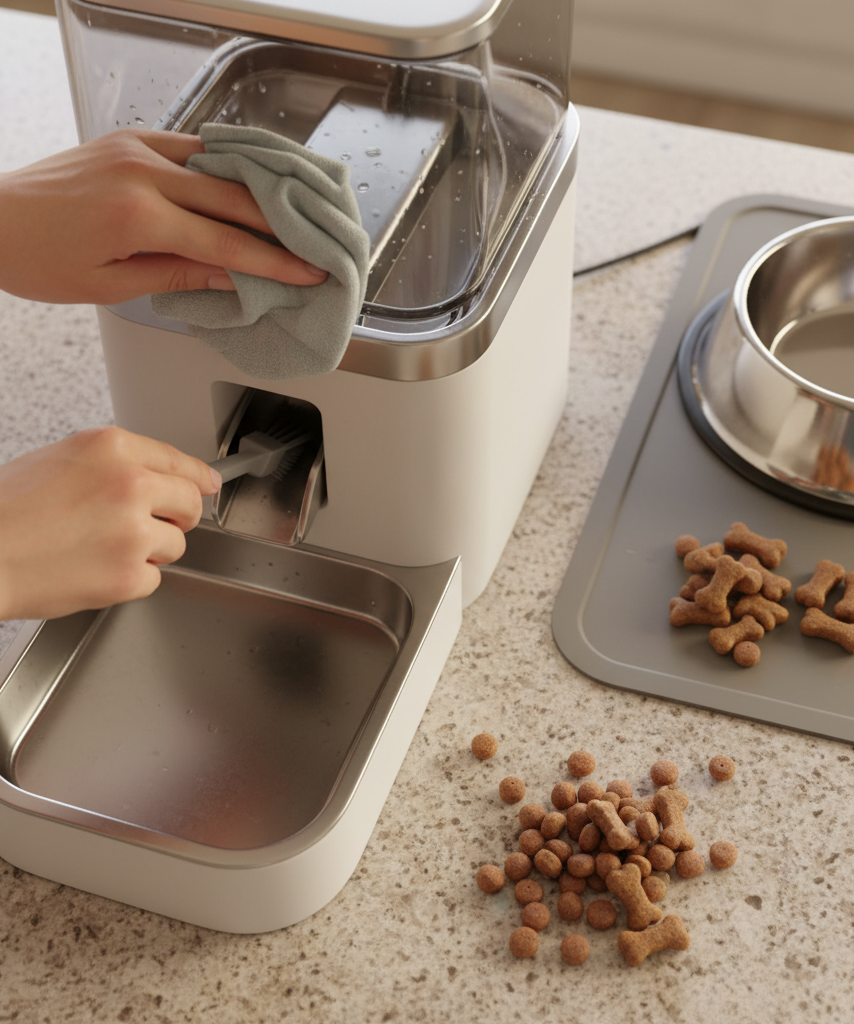
Step 2: Clean all food-contact parts and let them dry fully
Wipe away residue and make sure everything is completely dry before reassembly. Even a little leftover moisture can restart the same problem.
Step 3: Test with a smaller amount of plain dry kibble
Use a simple, uniform kibble for testing. Skip treats, toppers, freeze-dried chunks, and mixed textures until you confirm the feeder is working normally again.
Step 4: Check power and feeding settings
Replace batteries or confirm your adapter is firmly connected. Then verify:
- the current time is correct
- meal schedules are still saved
- portion settings are realistic
- manual feed works consistently
Step 5: Re-seat every removable component
Detach and reinstall the hopper, bowl, lid, and any internal rotating parts exactly as the manufacturer intended. If the feeder uses alignment marks, make sure they match.
Step 6: Run multiple manual test feeds
One successful test does not always mean the issue is solved. Run several small test cycles in a row. If output varies, a hidden jam or alignment issue may still be present.
When It’s Time to Replace or Upgrade the Feeder
Sometimes troubleshooting works. Sometimes the machine is telling you it is no longer reliable enough to trust with daily feeding.
You should think about replacing your feeder if:
- jams return even after thorough cleaning
- portions vary too much from one meal to the next
- the lid seal no longer keeps food dry
- the controls reset often or lose scheduled meals
- the motor strains with kibble the unit is supposed to handle
- you need better app control, alerts, or portion consistency than your current feeder can provide
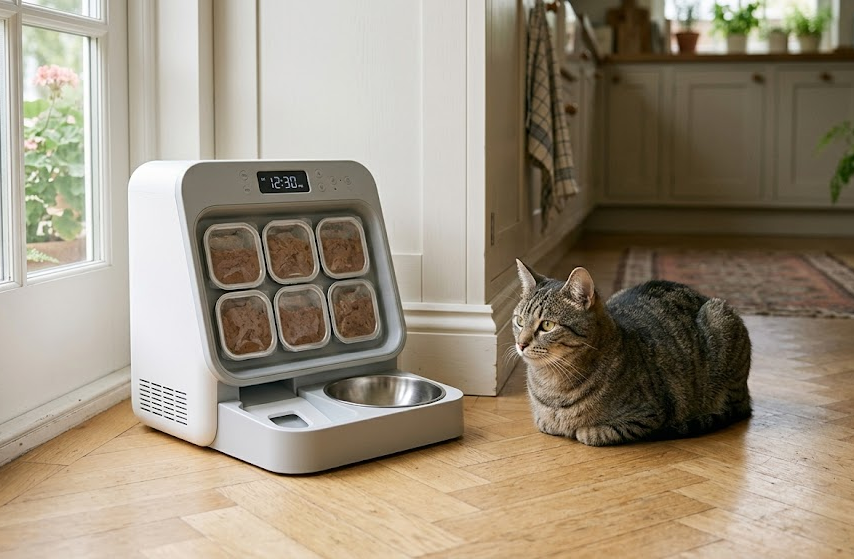
For owners who have already ruled out food size, moisture, and setup issues, moving to a smarter timed model with app control can make daily feeding more predictable. A good example is this ROJECO automatic cat feeder, which fits naturally into the “upgrade after repeated dispensing issues” stage because it focuses on timed feeding, remote control, and dry-food dispensing rather than forcing a multi-purpose design.
Features that help reduce common feeder problems
When comparing replacement units, prioritize these features:
- a chute design that handles standard dry kibble cleanly
- sealed storage that limits humidity exposure
- reliable scheduled feeding controls
- removable components for easier cleaning
- stable bowl positioning
- backup power options
- clear alerts when food is low or a meal is missed
How to Prevent Future Dispensing Problems
Once your feeder is working again, a few habits can keep it that way.
Use feeder-friendly food
Choose dry kibble that is:
- consistent in size
- not overly greasy
- free from large irregular chunks
- appropriate for your feeder’s listed capacity and opening size
Clean on a schedule, not just when there is a problem
A quick routine beats emergency troubleshooting. For most homes, that means:
- wiping food-contact surfaces weekly
- fully emptying the hopper regularly
- checking for dust or crumbs in the chute
- inspecting the power source and cable during cleaning
Keep the feeder in a dry, stable location
Avoid placing it where steam, splashing, or floor vibration are common. A level, dry location helps with both food flow and portion consistency.
Final Thoughts
If your automatic pet feeder isn’t dispensing food properly, start with the simple causes first: kibble size, moisture, residue buildup, assembly mistakes, and weak power. Those account for a surprisingly large share of automatic feeder troubleshooting cases.
If the same pet feeder keeps jamming after cleaning and testing, replacement may be more practical than repeating the same fixes every week. The best next step is choosing a feeder designed for consistent dry-food flow, easy cleaning, and reliable timed portions.
Leave a Reply